Is a Jaguar/LesPaul out of bounds for this site?
Moderated By: mods
Is a Jaguar/LesPaul out of bounds for this site?
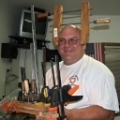
I am currently in the process of building three Jag body guitars, but using the 59 les paul scale of 24 9/16 with a 12" radius and electronics of a Les Paul. First of all wanted to know if that was appropriate for this site. I have lots of pics so far. Any thoughts would be entertaining. More to come if anyone is interested.
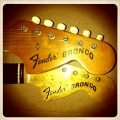


Step one for me was to take the plans I downloaded off the internet and redesign the headstock. Wanted something that I thought resembles the lines of the offset body.
I think this will work.


Got three Swamp Ash body blanks from a Luthier wood supplier in Missouri. I think I got a good deal on the wood. They were about $65 each. I planed, edge joined, and glued them together.

Here's what I ended up with after I ran them thru the drum sander. Two of them are very light and one is on the heavy side. Part of the reason I started this build was because I wanted something lighter than the Les Paul that I built for myself about 4 years ago. I call her Mahogany Rose my bib boned gal because she weights in at 13 pounds. I also liked the idea of building and offset body guitar. I just think they look awesome.
the reason for building three is because I always wanted to build one for my younger brother, so I figured if I can build two, why not build a third and see if I can sell it for enough to offset the cost of all three. Hopefully not a pipe dream.
This is my first time with pictures so we'll see if this works like I hope. If not, sorry.
Last edited by royb8s on Fri Oct 16, 2015 8:56 pm, edited 3 times in total.
-
vojtasTS29

- .

- Posts: 314
- Joined: Mon Aug 03, 2015 2:35 pm
- Location: Prague
ok, so I'm a newbie, but how do most people get their photo's to show. What is the best place that people use to store their photo's so they can be linked to? I have a google+ photo account, a google drive account, and facebook. I imagine there is a post somewhere on this forum that covers this, so could somebody please point me in the right direction?
-
Fakir Mustache

- .

- Posts: 4362
- Joined: Wed Sep 25, 2013 5:23 pm
I think it's probably Google which doesn't allow it to work. I tried to make them work by copying the address, but it doesn't.
There are other image hosting sites, you can do a search for "image hosting". For the time being though, you could simply post the addresses as links, so instead of copying the addresses and pasting them in a new tab, someone could just click on the link and it opens in a new tab (or window, depending on how their browser is set up).
There are other image hosting sites, you can do a search for "image hosting". For the time being though, you could simply post the addresses as links, so instead of copying the addresses and pasting them in a new tab, someone could just click on the link and it opens in a new tab (or window, depending on how their browser is set up).


With Google hosted stuff, you need to click on your picture so its full screen, then right click it and get the image URL. As long as the URL ends in an image format like JPG PNG etc you'll be ok to use the IMG tags on forums like this one.
Thing is, seems like your pics, Google isn't giving the actual URL and only a bunch of generated code
Thing is, seems like your pics, Google isn't giving the actual URL and only a bunch of generated code
Mike wrote:All my LEDs are bright, the blues are bright as all hell.
mezzio13 wrote:JJ makes sweeps look easy and effortless. His nick name should be broom.

I drew up my template for neck pocket and Pickups. I am going with humbuckers. They are Fender twin head, but I will be wiring with coil tap switches in the volume controls so I can still get that single coil sound. I did the same thing on my Les Paul, and it works great.

I used a kind of plywood that we use to put in the floor of our driftboats here in southern oregon. It has a slick surface that the router glides on real well, and is hardwood and very durable. I am not going with a trem system on this guitar because I want my guitar to stay in tune, and really don't use one in my style of play.
-
Fakir Mustache
- .
- Posts: 4362
- Joined: Wed Sep 25, 2013 5:23 pm


I have never used one of these bridges before, but I wanted to go with a hard-tail, and preferably not string thru body. After a lot of reading and studying, this seemed like the best option for me. Adjust-ability alone, and the fact that it's made out of brass instead of pot metal. Initially I was gonna go with a trem, but was more concerned with the guitar staying in tune, and I have never played with a trem before, so why start now.Fakir Mustache wrote:You're going to use one of those Schaller top-mount bridges? Those are awesome, but not popular on most forums because not vintage.
As far as being vintage, I already did that when I built my Les Paul '59. It is a sweet axe, but I wanted to build something that gave me the absolute best of all worlds for my playing style, and still looked awesome, hence the offset body. Everybody has a strat or tele, I just always had to be different.
My style of play is mostly rhythm guitar in a church youth group band. I do most of the arrangement for the whole band, and we also play about 5 or six concerts a year at the local park, or at church summer camps. I play thru a Boss GT-100 into two 80 watt full range keyboard amps, and then also feed directly into the house. The Music I play is mostly Christian rock and Christian pop music. Sometimes I also play at the retirement homes, and altzheimers homes in the area with my dad who loves to play old country and gospel music on his acoustic. We have a blast, and the audience always is appreciative.
The Necks

I got three Really straight quartersawn rock maple neck blanks. I did not want any figuring in the maple because I am more interested in wood stability than wood pretty in these guitars. I also got three unslotted indian rosewood fretboards. I have a friend with a gang saw set up to saw 24 9/16 scale length. I was originally gonna go with a 24, but I like my Les Paul so much and it fits my short fat stubby fingers, that I decided to go with that scale length and a 12 inch radius. Just makes better sense for me.


I went with a dual action truss rod from stewmac. First time using the spoke style, and I'm recessing it into the butt end of the neck. I got the idea from watching a fantastic youtube video from a guy named Fletcher. I'll try to find a link to his vids, because they REALLY helped a lot.


I'm sure the following will be old news to many of you, but I learned something from another youtube video that has helped me tremendously, and I would like to pass this on to any other newbies at inlying. When I built my first guitar, I laid the inlay on the rosewood and traced it with a pencil, then later tried to route to the pencil marks. This is a slow and tedious way of doing it, and I think this tip will make your inlays much more accurate and faster.
1. Put one tiny drop of gel super glue on the back of the mother of pearl, and then place it on the rosewood where you plan to inlay it. It will only take less than a minute to set in place.
2. When you are happy with it's location, use a very sharp exacto knife to trace around the entire edge in your inlay. Take your time, and make several passes to get a good scribe mark.
3. Once you have an entire outline, then gently pry the inlay off of the fretboard and set it aside.
4. You should now have a very good line to route up to. It really works, so try it out. Here are a few pics that may help show what I'm talking about.


